Thursday, June 08, 2006

New Halloween Prop


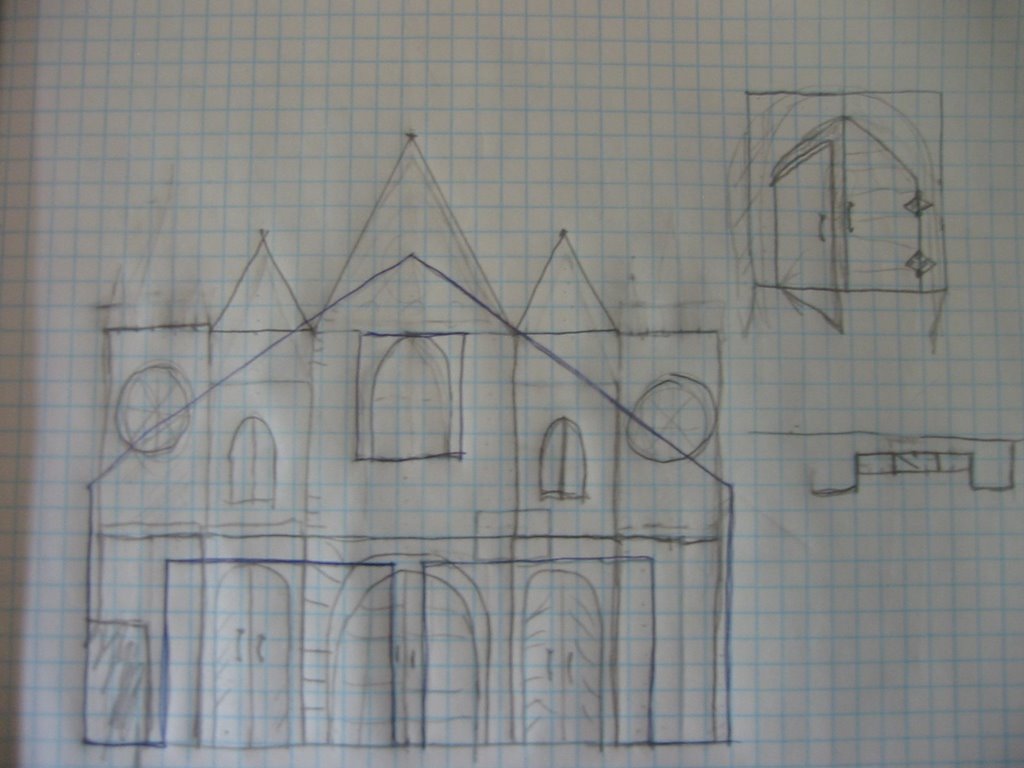
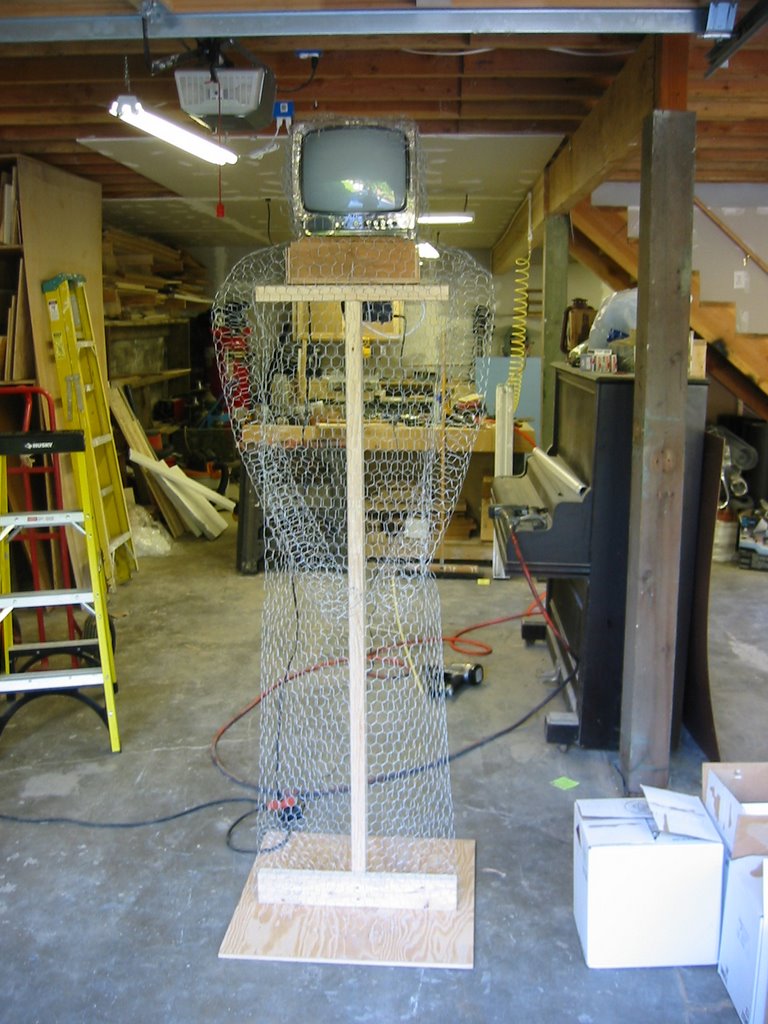
We are working on creating a creepy watcher that sits outsides the gates and greets people. We got the idea from the Grim Reaper from Scrooged with Bill Murry.

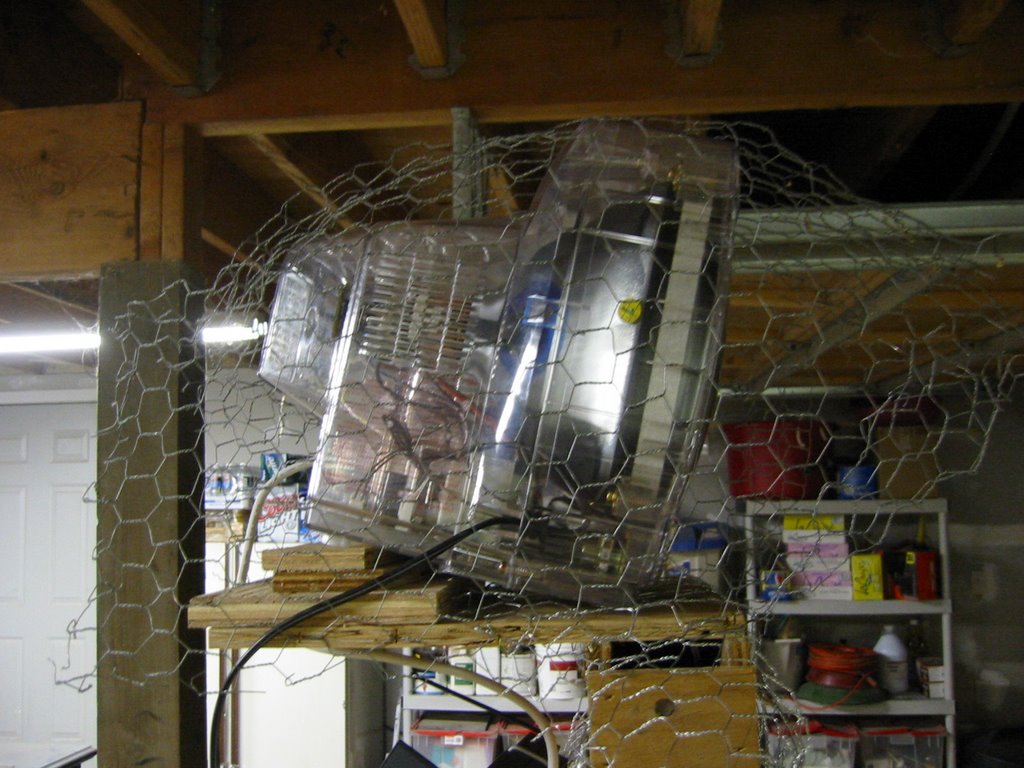
I found a clear plastic 12 inch BW TV at good will for a steal. I have a video transmitter that will send video/audio wireless. We want to have some weird random video clip playing (think the ring). The audio will be a disguised voice from a microphone on the patio. We will also have a camera with audio in his chest that sends back a signal to a TV at the patio. This way we can see who is there and talk to them. Still working out all the details but it is going to be COOL!

Foam Panel test


I created a foam panel today with 1 inch 4x8 foam. I used screws with washers to hold it on along with glue. I covered some of the washers with the foam "stuff"? Not sure how this is going to work. We will try texturing the panel and painting it to see how it works. 1 inch foam is half the cost of 2 inch foam. If this works for us it will help the budget.


More Molding and Casting

I spent this week trying some molding on my own. I finished getting rubber on the jawless skull. I tried to create a plaster of paris mother mold by placing it on by hand. I ended up cracking both halves. I ended up cutting out a profile of the head out of thin wood and placing in the middle of the rubber mold and then creating a 1 inch thick mold of plaster. I then removed the wood divider, covered the seam in valsaline and then poured the other half. This worked GREAT! I quickly poured a rigid foam mix in the mold and gave it a try. It turned out great except the teeth broke off and the head didn't fill completly.


I finished the rubber on the jaw. I poured a rigid foam mix right into the rubber mold. The jaw turned out a little puffy because the foam pushed the mold appart. So I needed a plaster of paris mold for it. I covered the entire jaw mold in plaster of paris. Big mistake. I couldn't get the rubber mold out. I had to chip away at the top of the mother mold enough to get the rubber mold out. I cast another jaw which looks much better but still had some issues. I think I am going to have to make a 2 part mother mold for the jaw too.


I created a rubber mold of my fancy carved skull. I then used the same technique and made the plaster mother mold in 2 halves. I then cast it in rigid foam. I had to pour some extra foam to fill it in. Which worked great (no seam).


Tuesday, June 06, 2006

Halloween Preview

We are building 2 new projects this year for halloween. One is HUGE! The other is just a better version of what we had.

We decided this year to make scale models of what we were going to do so we weren't designing in full scale as we were building it. We wanted to know ahead of time how much the material was going to cost.

My first project was a new Mausoleum. I sketched out a drawing on paper of the new design and then built a little model out of foam core. We went with a more traditional crypt style. The back is open so we can rear-project the ghost onto a screen that will hang in the middle. The columns are not to scale (I just rolled up some printer paper).


Our big project this year is a large church facade for the front of the shop. I started out by making a scale model of the front of the shop. I then cut a bunch of 4x8 panels and then built it from a sketch we drew. It even has little plastic windows. It will take 25 4.x8 sheets of foam and over 100 8' 1x3's to build.

Saturday, June 03, 2006

New Tombstone Techniques


I worked on some new ideas for Tombstones this week. I bought a router bit for my Dremel tool and a cutter attachment to steady the dremel when using the bit. I glued down the lettering onto the plastic film covered white foam. Using the Dremel and my router I carved out all the letters. This was much faster then an ex-acto knife and easier.


We wanted to create a better way to stand the tombstones in yard and make the back of the tombstones look more simple. Instead of the PVC pipes and clamps that are there now.

I routered out a grove in the back of the tombstone deep enought to place an 18" 1/2" PVC pipe. I then glued a piece of 1/8" hardboard over the grooves. Using rebar the tombstone just slides right onto them and you can't see how they are being held up. Works Great!


Molding and Casting


Chris Reid and I worked on molding and casting this week. I bought some RTV rubber from TAP Plastics and we made a mold of a Bucky Skull with the jaw. We used Plaster of Paris to make an outside cast for the rubber mold and then used rigid foam to make the first head. We then poured another with self-skinning foam. The both came out great. We need to work on our mixing amounts so we get enough in the mold but not too much. Tony helped us out our first day and provided telephone support when we had questions. We are now making a mold of a skull without the jaw and then casting the jaw separately.


Thursday, June 01, 2006

Great Weekend

We went to ashland for the Memorial Day weekend. We left Friday and drove back late Monday. As usual we didn't bring our camera. We mainly go down with our friends Linda and David Barber to see plays and go wine tasting. They have been making the trip each year for over 17 years. We have been meeting them down there for the last couple of years. We did and saw a lot. I thought I would do something a little different and include a list that Chris made about our trip (she doesn't know I am doing this). Maybe this will make up for our lack of pictures.

Juggling
Wine
Lemon bar
Shakespeare
Stories involving Bears
Smoked blue cheese
Rain
Sunshine
A lawn chair
Handmade soap
Oscar wilde
Fiasco
Goats
Parasaling
Winding roads
Tucker and Fred
Baby ducks
ferns
retired school teachers
grave dirt from Transalvania
hearses
kindred spirits